Mill Hill Cottage Plumbing & Heating Ltd(Previously Heating Innovations)
|
|||||||
|
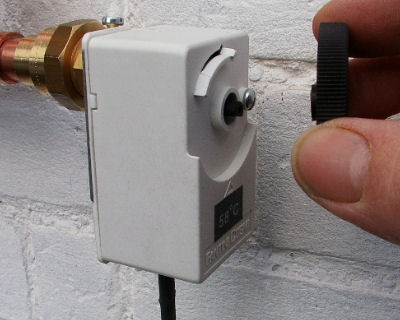
Dry Well Thermostat Introduction (also known as the Pipe Stat, Aquastat or Immersion Pocket Thermostat). A dry well thermostat is supplied with the H2 panel, it is a very important link in the control system indicating the status of the solid fuel boiler, either the boiler is up to working temperature (58°C) or it is not, it controls the following functions
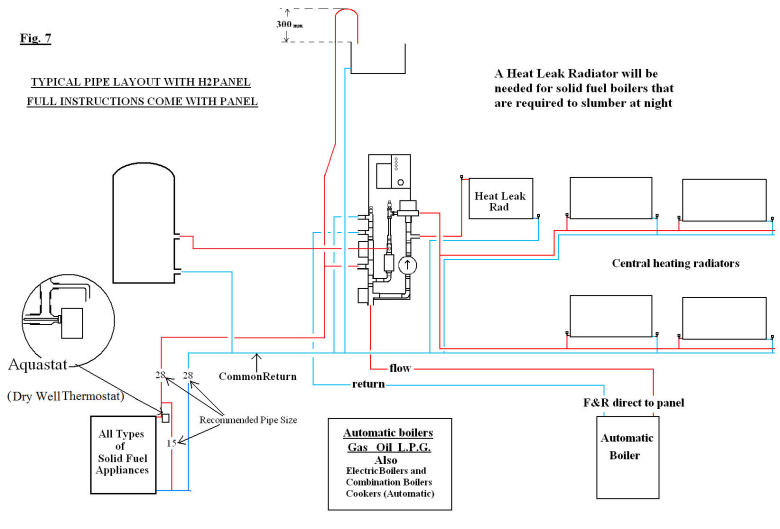
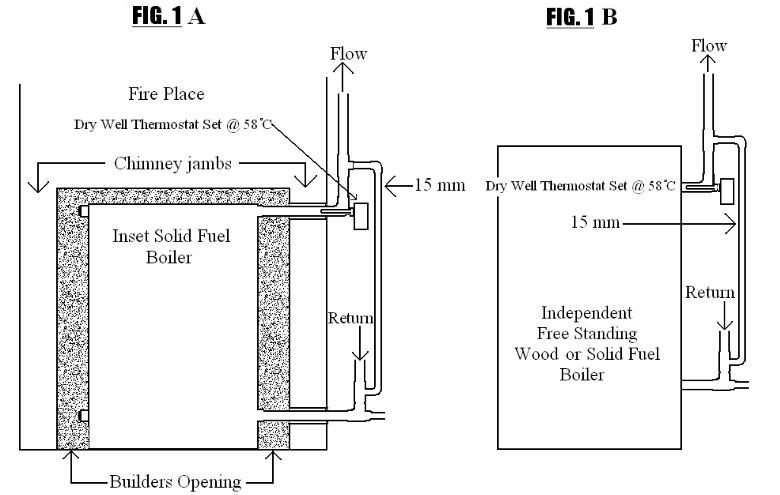
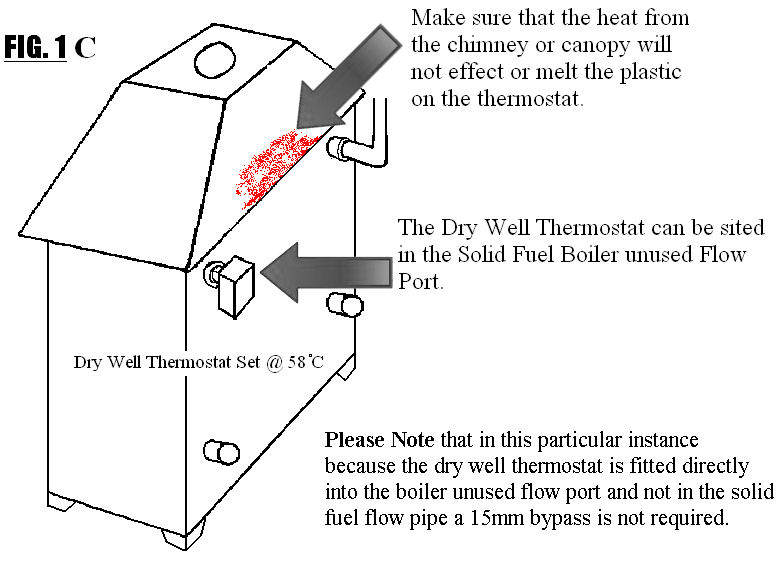
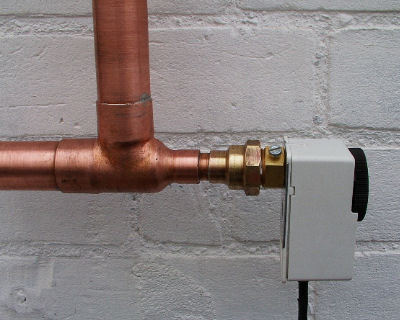
Positioning the Dry Well Thermostat In order that the dry well thermostat carry out its purpose efficiently it is crucial that it is correctly sited and installed on or near the solid fuel appliance, see figures 7, 1A, 1B, & 1C below
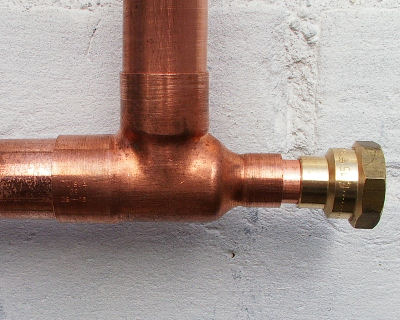
Dry Well Thermostat fitted close to the boiler in the solid fuel flow pipe
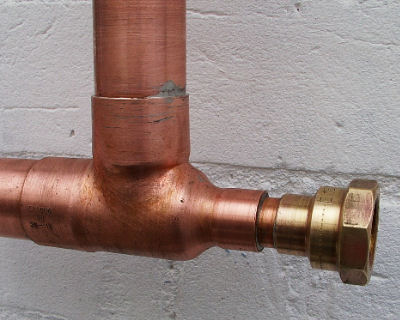
Dry Well Thermostat fitted in solid fuel boiler unused flow pipe
|
|||||||
| Dry Well Thermostat Installation | |||||||
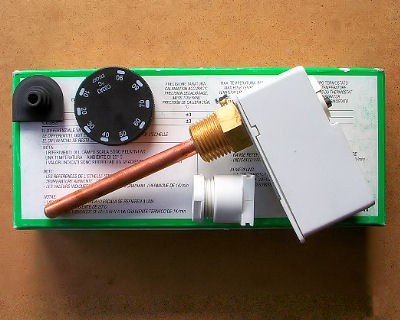
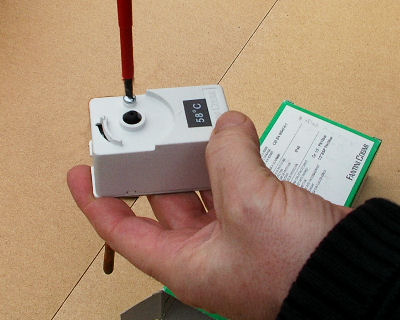
Contents of the dry well thermostat box
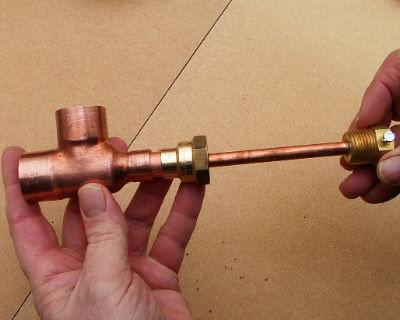
The dry well pocket has a 1/2 inch BSP male thread so I will need a female fitting to screw it into. |
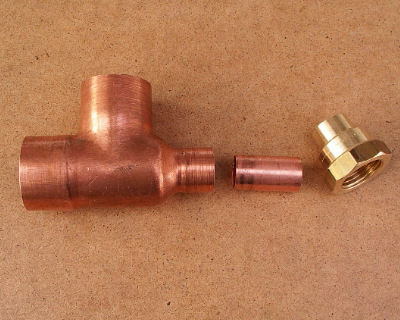
To accommodate the dry well pocket into the solid fuel flow I am going to use a 28x15x28 tee, one end reduced, a standard 15mmx1/2 inch straight female connector and a short piece of 15 mm pipe (length of the pipe will vary depending on what type and even brand of fitting you are using) . I could have used a male connector and gone straight into the tee, but did not have one available |
||||||
Introduce the pipe to the connector, and.... |
the pipe to the fitting. |
||||||
Loosen the dry well pocket retaining screw and..... |
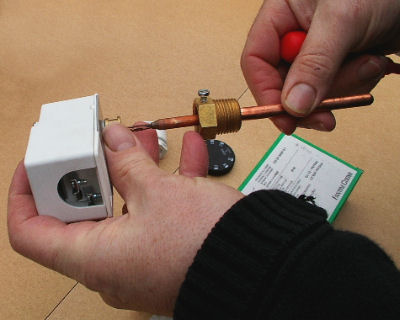
Carefully slide the dry well pocket off the copper bulb sensing element. Please handle with care. |
||||||
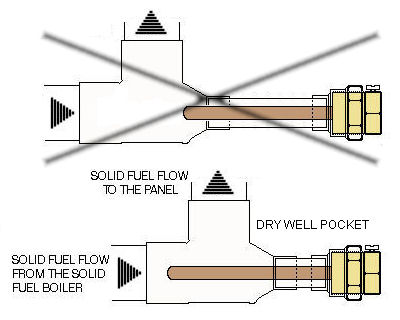
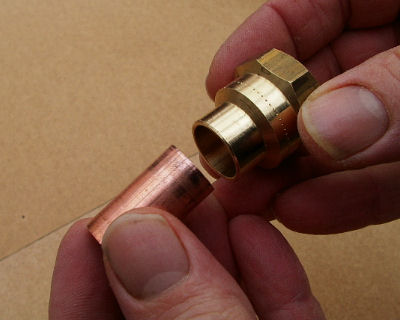
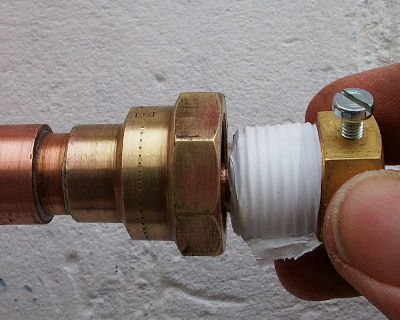
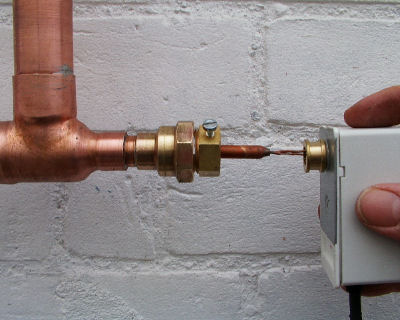
To ensure the thermostat is as responsive as possible it is important that the dry well pocket is right into the solid fuel flow, as in the diagram above. Before I start any soldering I check it is sitting correctly by...... |
sliding the dry well pocket into the fitting and... |
||||||
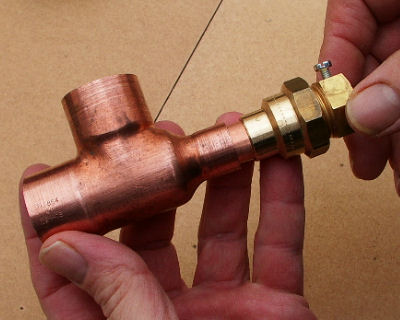
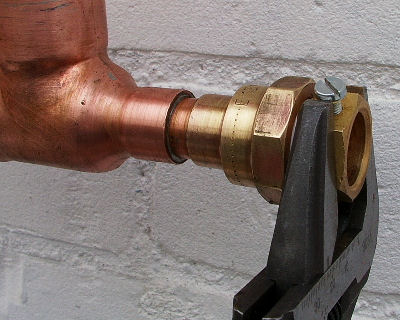
screwing the dry well pocket into the 1/2 inch female connector. If the well is not right into the flow shorten the 15mm pipe until it is. |
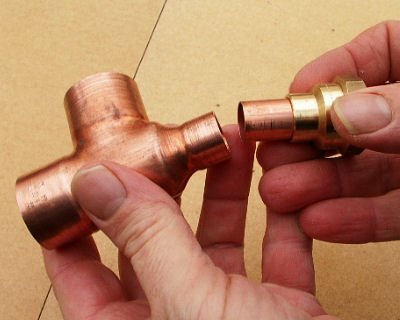
When pipe length is adjusted correctly, unscrew the dry well pocket and |
||||||
flux and solder joints. |
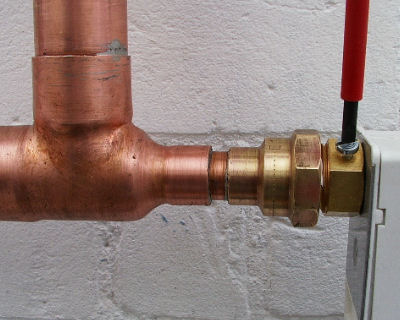
Wrap the 1/2 inch thread of the dry well pocket with sealing tape and screw into the female fitting |
||||||
tighten with a spanner |
Remove dry well thermostat thermoplastic cover retaining screw |
||||||
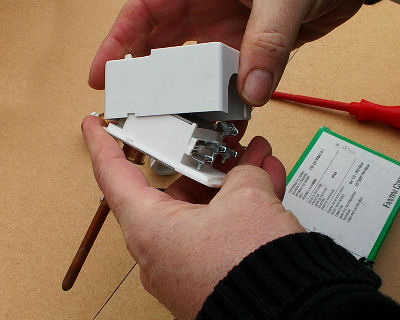
remove thermoplastic cover |
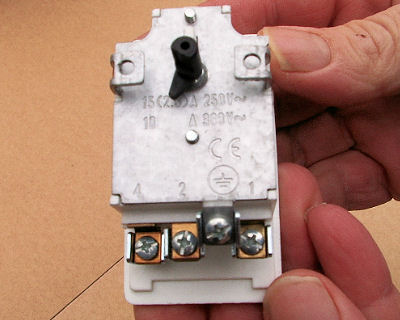
Terminals are clearly labelled, when temperature set is satisfied the snap action microswitch makes terminals 1-4 1. Common (C) 2. Break on temperature rise (NC) 4 Make on temperature rise (NO) |
||||||
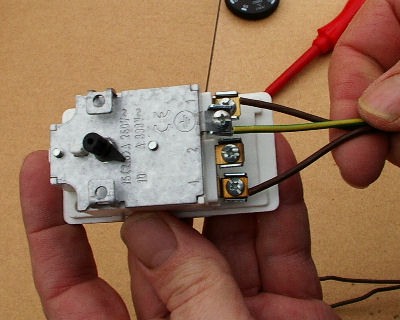
Slide the wire through PVC grommet and connect two wires to terminals 1 and 4 earth wire and to earth terminal. Please note terminal 2 is not used. |
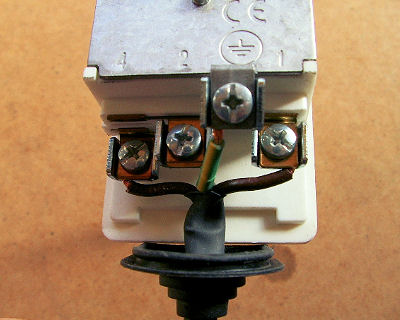
Tighten terminal screws and slide grommet up |
||||||
Slide grommet into thermoplastic cover and refit cover to thermostat |
Carefully slide copper bulb sensing element into the dry well pocket |
||||||
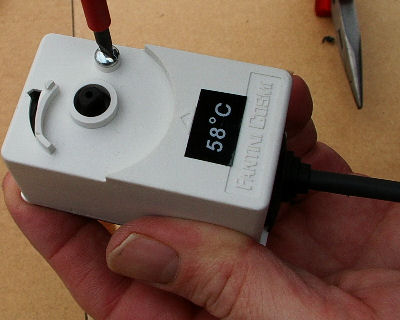
When thermostat is completely home tighten the dry well pocket retaining screw and....... |
push the dial on. |
||||||
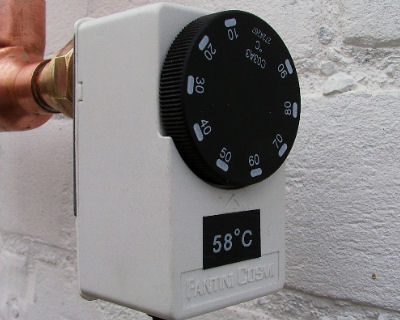
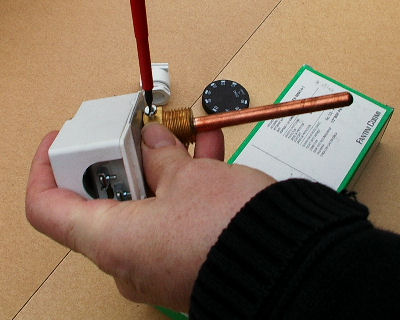
Set dial to 58 degrees Celsius |
This end is complete. |
||||||
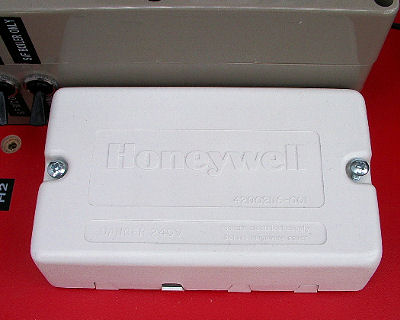
Back to the H2 panel, remove Honeywell junction box cover |
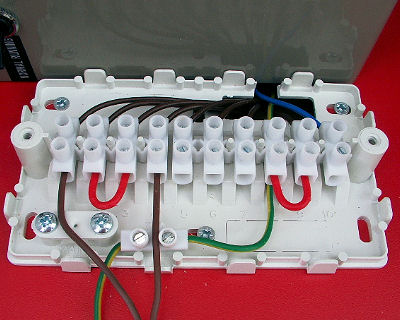
Terminals are labelled 1 to 10 from the left in this photo, it will be from top to bottom for you a) connect earth wire to single loose earth terminal. b) connect terminal 1 on the thermostat to terminal 1 on the H2 panel junction box and c) connect terminal 4 on the thermostat to terminal 4 on the H2 panel junction box
|
||||||
|
Contact Mill Cottage Plumbing & Heating Ltd Technical Support and Sales Telephone 01354 653854 |
|||||||